
Using Figment with PIX2PIX
Figment is an amazing tool for preparing data for machine learning models. We love PIX2PIX because it gives control and it can learn a lot from input data.
The best input data is structurally similar to the input data, that is, there is a one-to-one relationship from the input to the output data. Here are some examples:
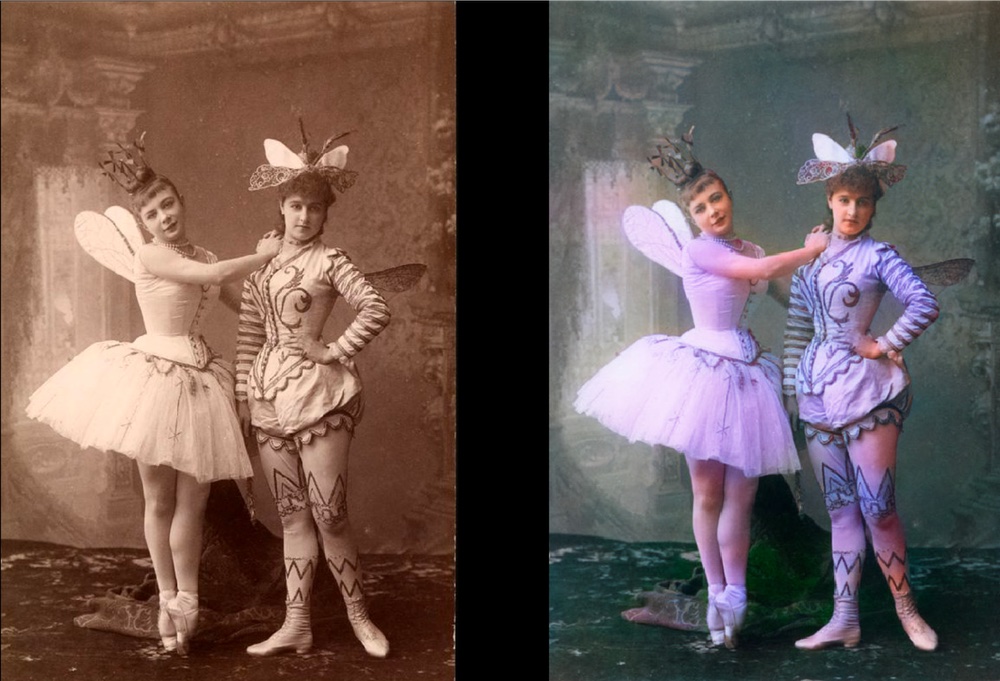
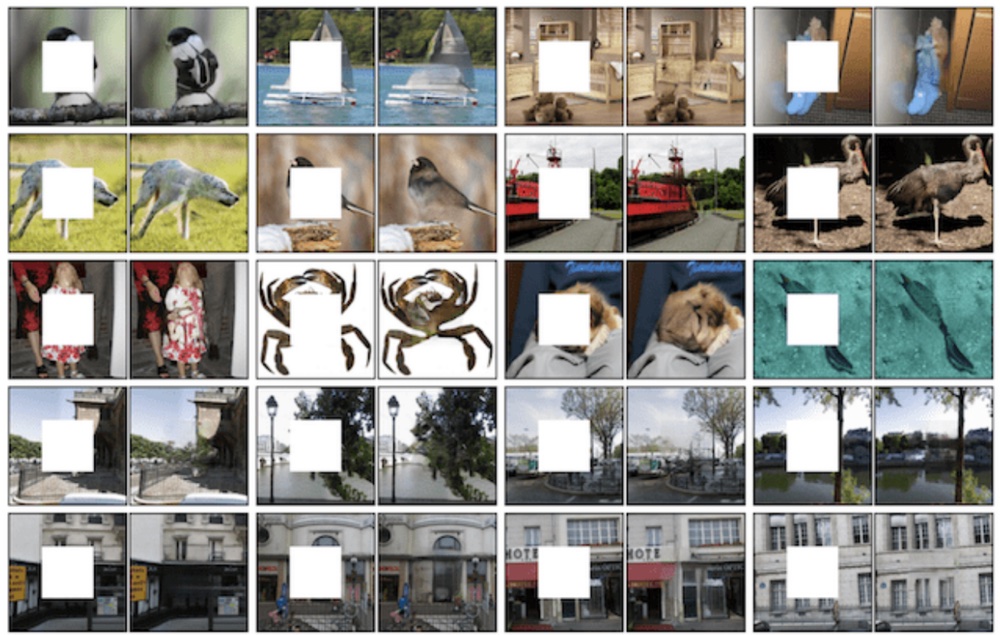

The trick to making the training data is doing the opposite transformation of what we’re trying to acquire. So, as an example, to convert black and white image to color images, we’re using existing color images and removing the color information, then letting PIX2PIX learn the color mapping.
Video Tutorial
What we’ll make
We’re making a face generator that’s built on artificial faces, using This Person Does Not Exist. In a way, we’re creating a second-generation AI, based on existing AI.
This idea was actually developed by Alexandra Fraser in her project Maureen.
Acquiring the data
We have a folder of data prepared that you can download. These are 5,000 images downloaded from the This Person Does Not Exist website. Download the ZIP file here: does-not-exist.zip
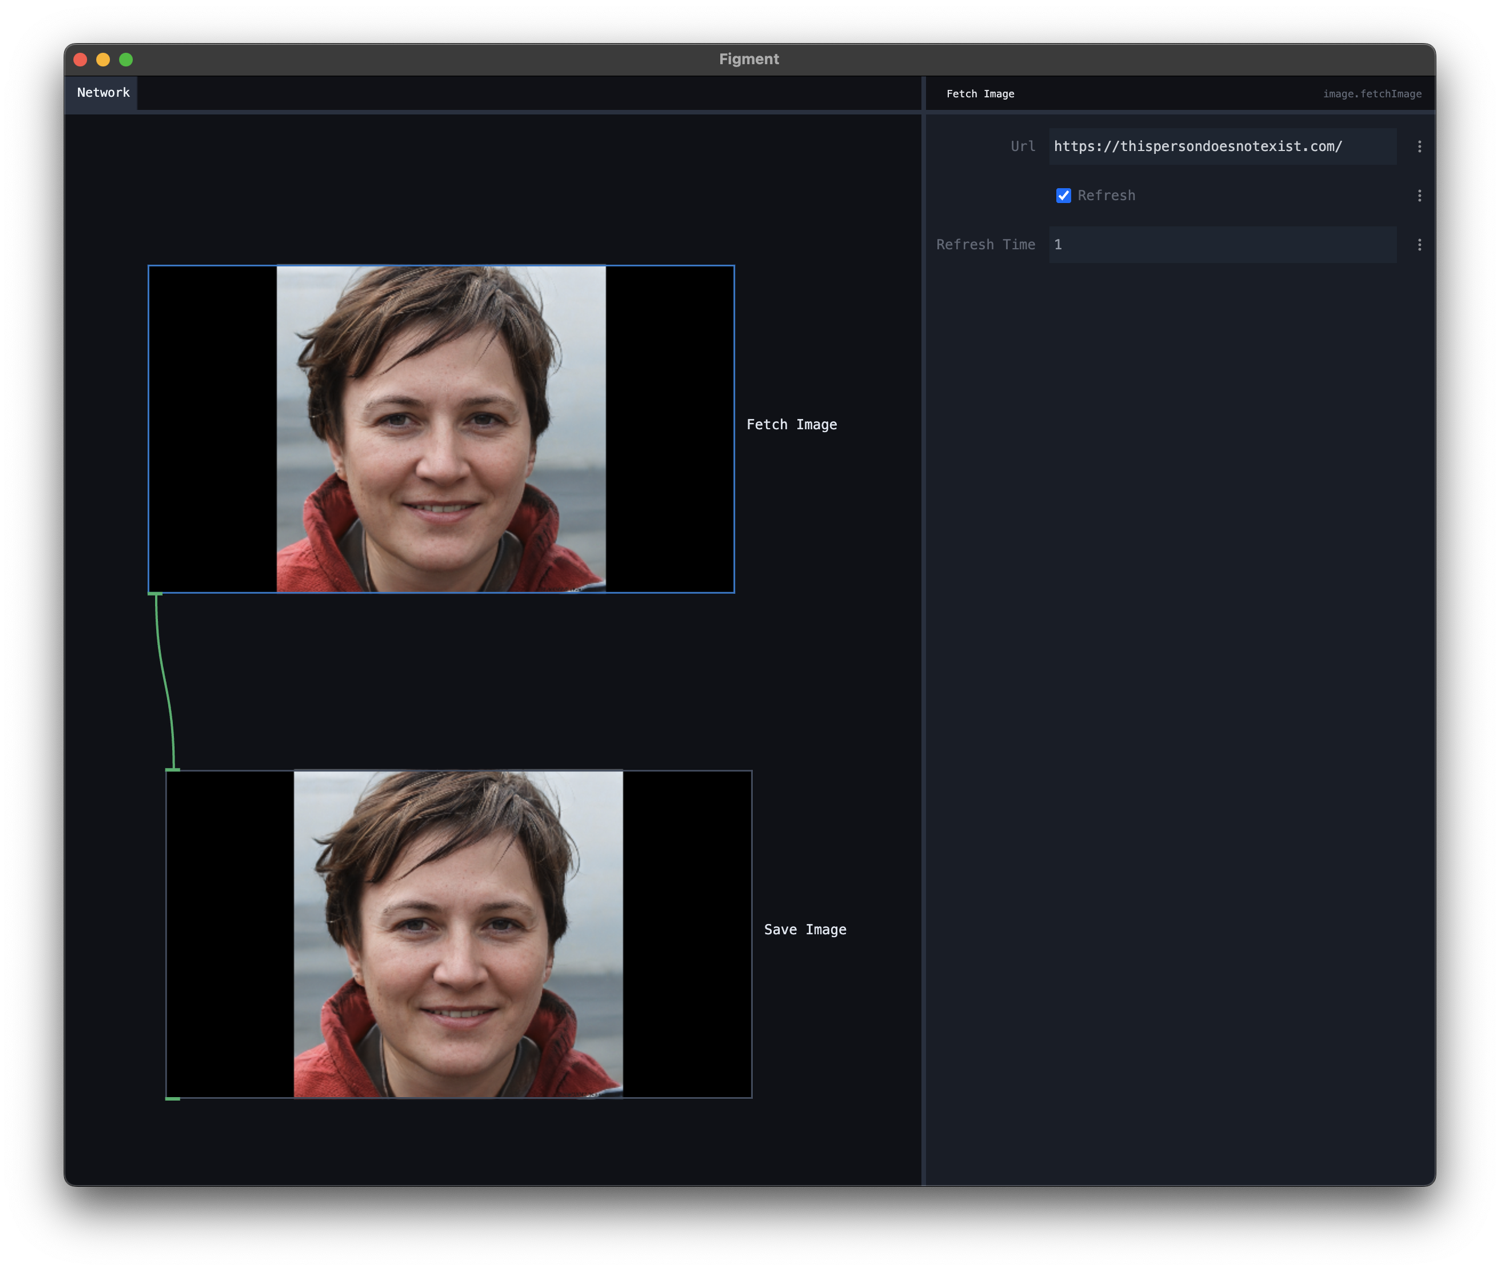
However, we can also do this using a Fetch Image node. In the case of this website, we can fetch the same URL repeatedly and get a different image every time:
- Create a Fetch Image Node. Set the url to
https://thispersondoesnotexist.com/, the “refresh” on and the refresh time to 1 second. - Create a Save Image Node. Choose the folder.
- Select File > Render and render out as much images as you want. Set the framerate to 1 (same as the refresh time).
Setting up Figment
Create a new project folder, e.g. on your desktop. Open Figment and immediately save the file in the project folder.
Put your images folder in the project folder as well.
In your new project, delete all nodes. We’re going to start from scratch.
Create a Load Image Folder node, click the “Choose” button next to the folder, and select the images folder. The images should now be “animating”:
:::tip
You could also use the webcam node to generate an artificial, creepy version of yourself!
:::
The PIX2PIX algorithm requires the input to be square. We’re going to be using 512x512 images, so we’ll use Resize node to mold them into shape.
- Create a
Resizenode. - Set the width and height both to
512. - Set the fit mode to
cover. - Connect the output of the
Load Image Foldernode to the input of theResizenode.
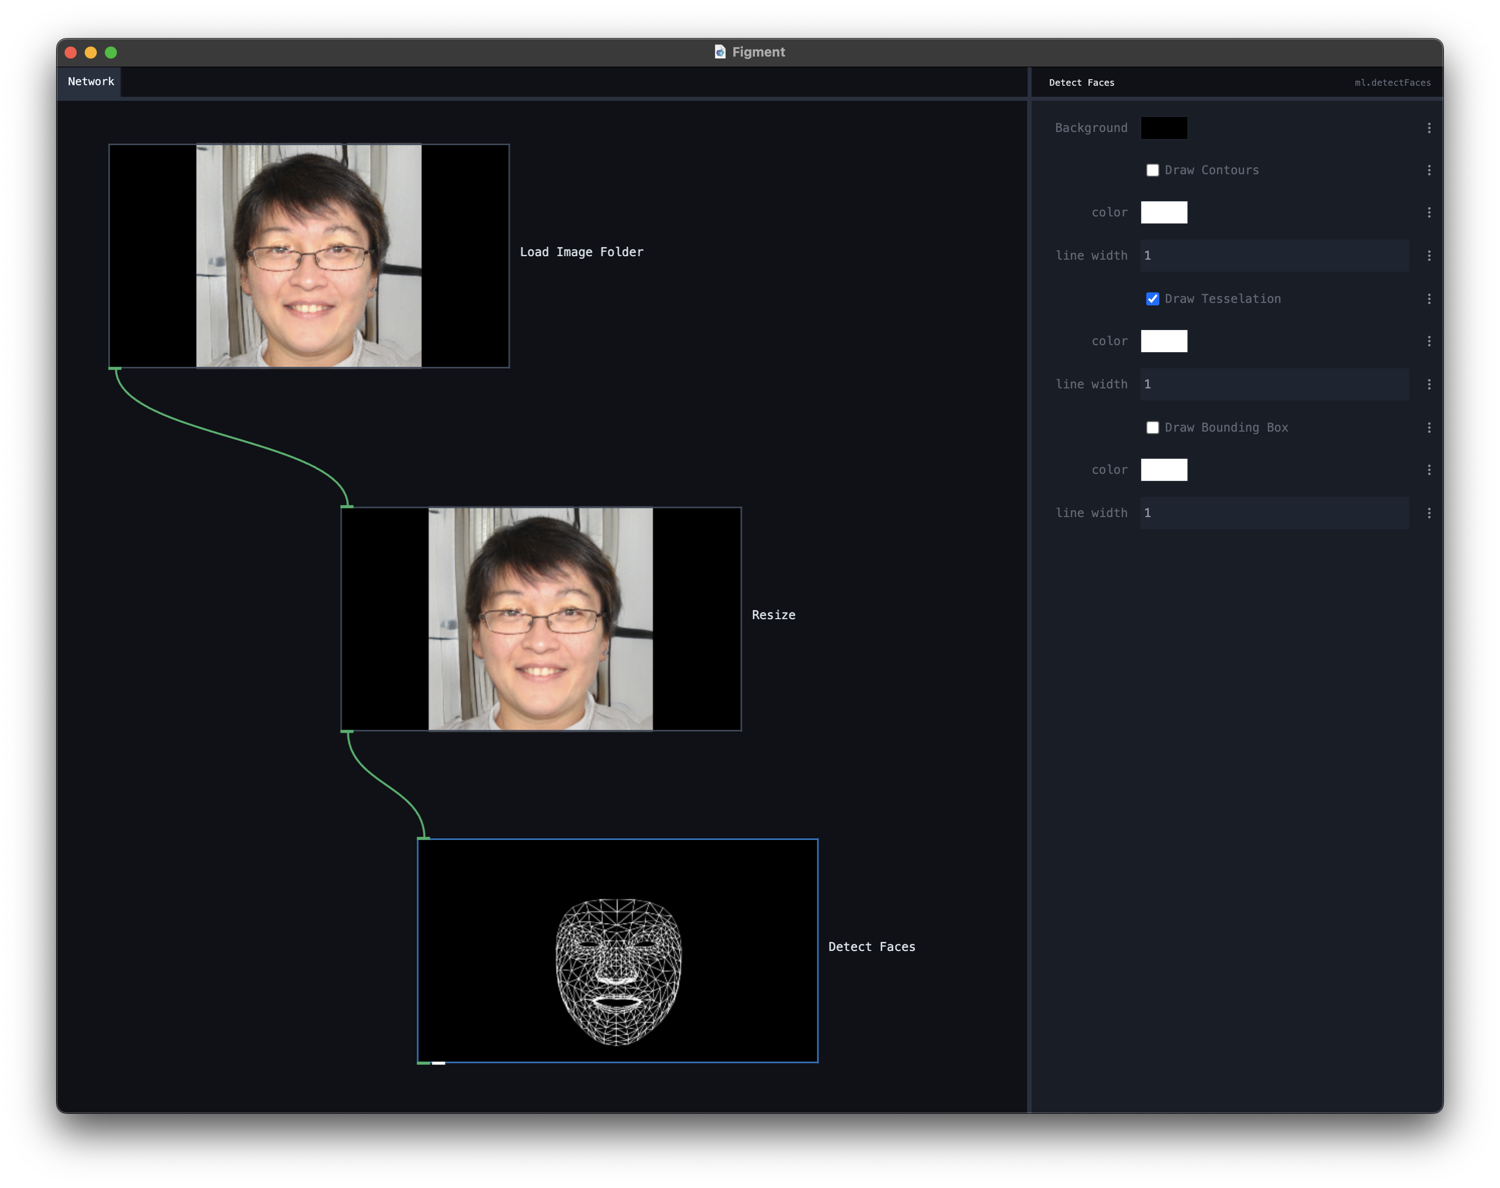
Since these are faces, we want to use a face detection algorithm. The Detect Faces node works well here. It uses Google’s MediaPipe Face Mesh to detect face landmarks. Set it up to draw the face mesh.
- Create a
Detect Facesnode. - Turn off Draw Contours
- Turn on Draw Tesselation.
- Connect the output of
Resizeto the input ofDetect Faces.
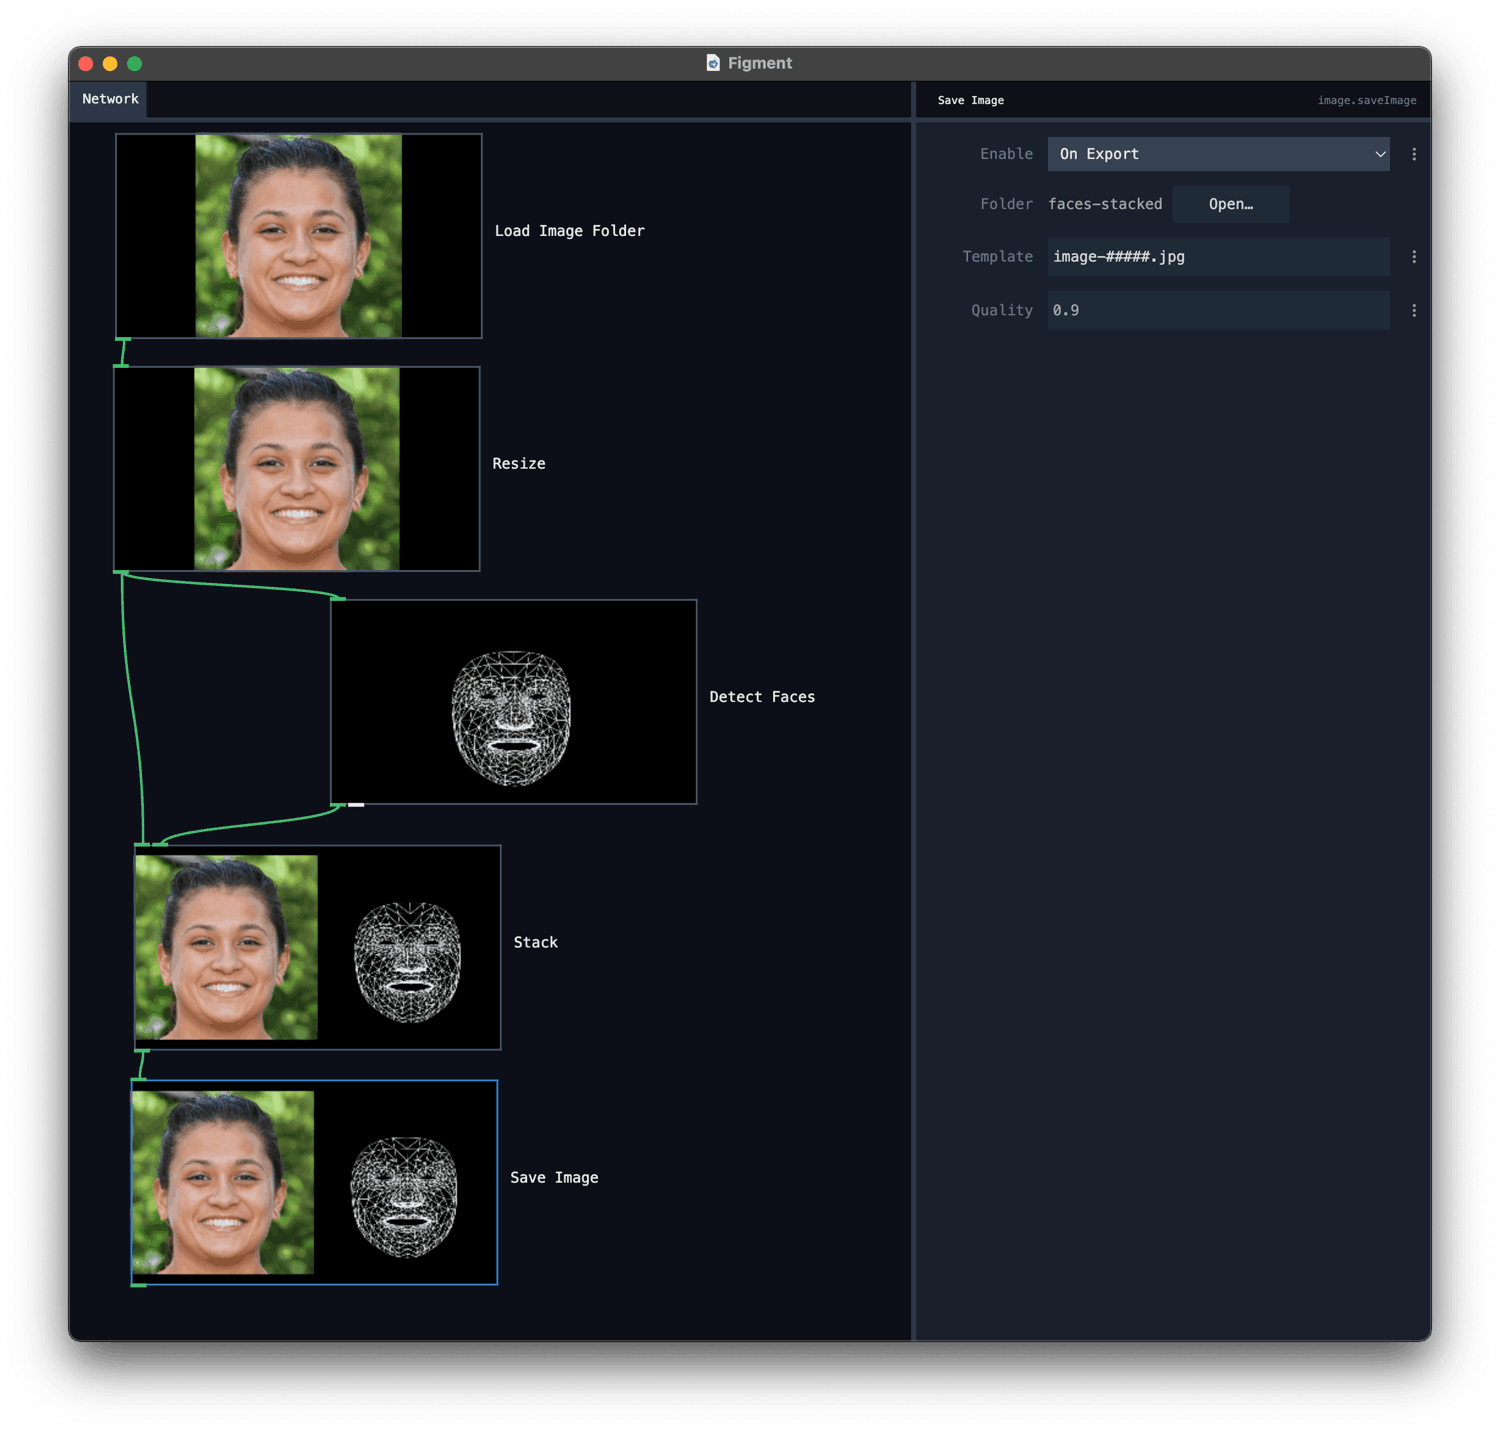
Our PIX2PIX implementation requires the two images side-by-side. We’ll do that with a Stack node. Note that our final size should be 1024x512, so we’ll take the output of Resize and Detect Faces, which are both 512x512.
- Create a
Stacknode. - Connect the output of
Resizeto the first input ofStack. - Connect the output of
Detect Facesto the second input ofStack.
The finishing touch:
- Create a “Save Image” node.
- Set the folder to save to.
- In template, use
image-#####.jpgto save the images with a number. - Connect the output of
Stackto theSave Imagenode.
We’re ready to export. We’ll export 5000 frames (as many as we have input images) to an “input” folder.
:::info
Why is the exported folder called “input”? It’s because it’s the input for the next step, which is the PIX2PIX machine learning algorithm.
:::
Training the model with Paperspace
We’ll use Paperspace to train our model. We’ll set up a new project, and use their dataset feature to create a number of datasets. We’ll use our own open-source pix2pix implementation to generate the model, then convert it to Figment.
First, create an account on Paperspace. Once you’re in the console, create a new project. You can call it anything you like. You should be on the notebooks tab:

First, upload the data. Switch to the data tab:
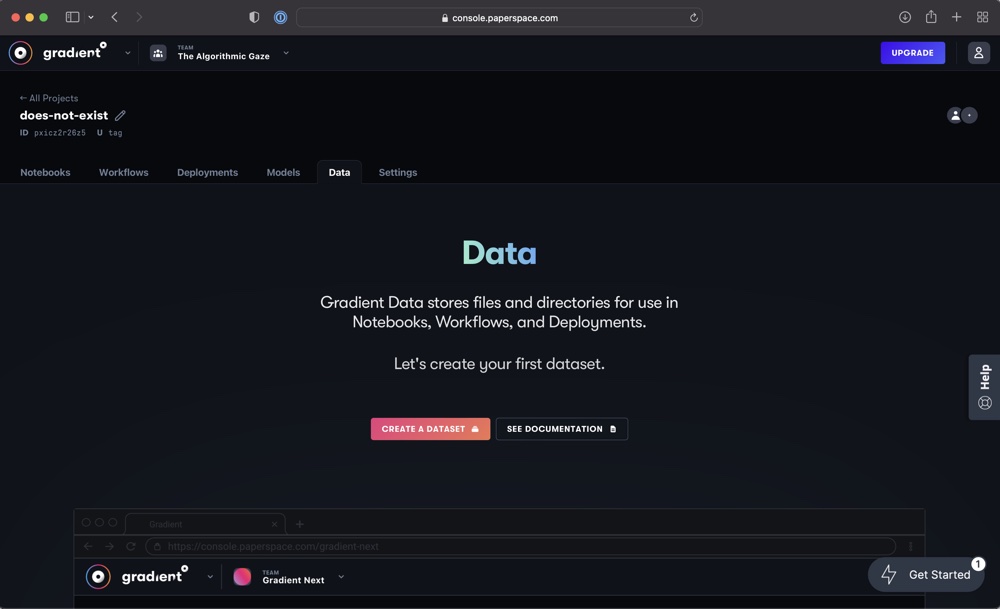
Choose “Add” to create a new dataset. I called mine does-not-exist. Then, upload the 5,000 images you prepared.
:::info
Data uploaded this way will be available in the /storage directory in a Paperspace notebook.
:::
Go to the Notebook tab and create a new notebook. Choose “Tensorflow”. Select a GPU machine (you can choose a free one, though it will take a while for results to appear).
In the advanced options, set the workspace URL to:
https://github.com/figmentapp/pix2pix
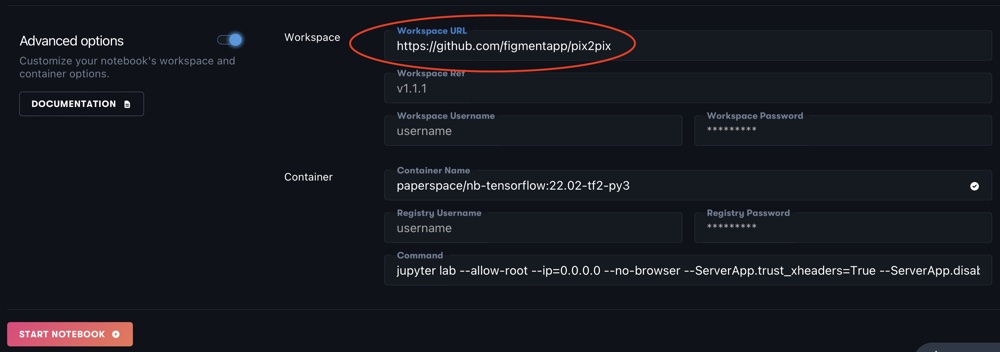
Press “Start Notebook” to boot up the notebook. It will say “Starting” for a bit, then show your files on the sidebar.
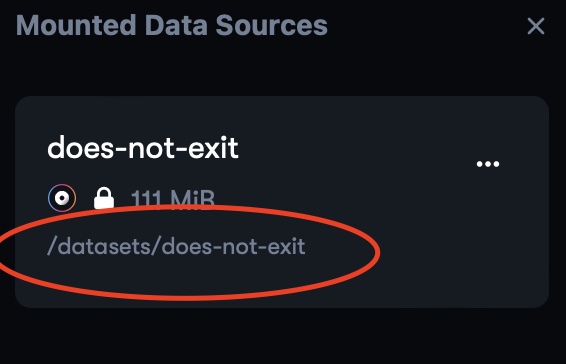
Mount the data sources
Click the “data sources” icon in the left sidebar. Find your data source (mine is called “does-not-exist” and click the “Mount” button)

Once mounted, it should show the directory path for the dataset. Mine is /datasets/does-not-exist, so that is what we’ll need to fill in.
Training with PIX2PIX
Open pix2pix_train.ipynb. The script is all set up, you just need to update the paths:
- Find the cell that starts with
project_dir. Set the project directory to"_projects/does_not_exist". - Change the
dataset_dirto"/datasets/does-not-exist". - Leave the rest as-is

At the very end, you might also want to tweak the number of steps the model runs. This is set quite high (500_000 steps), which will take a long time to run. Setting it to 100_000 steps might already give decent results.
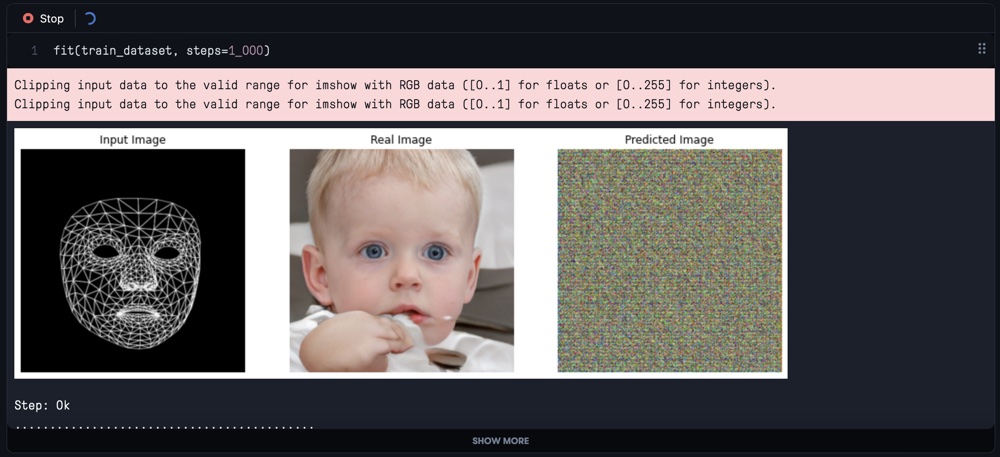
Once all cells are setup, you can press “Run all” at the top to run all cells. Scroll through the script to see if there are any errors. If not, you should see training happening at the end of the notebook. There will be dots slowly moving across the screen, indicating progress.
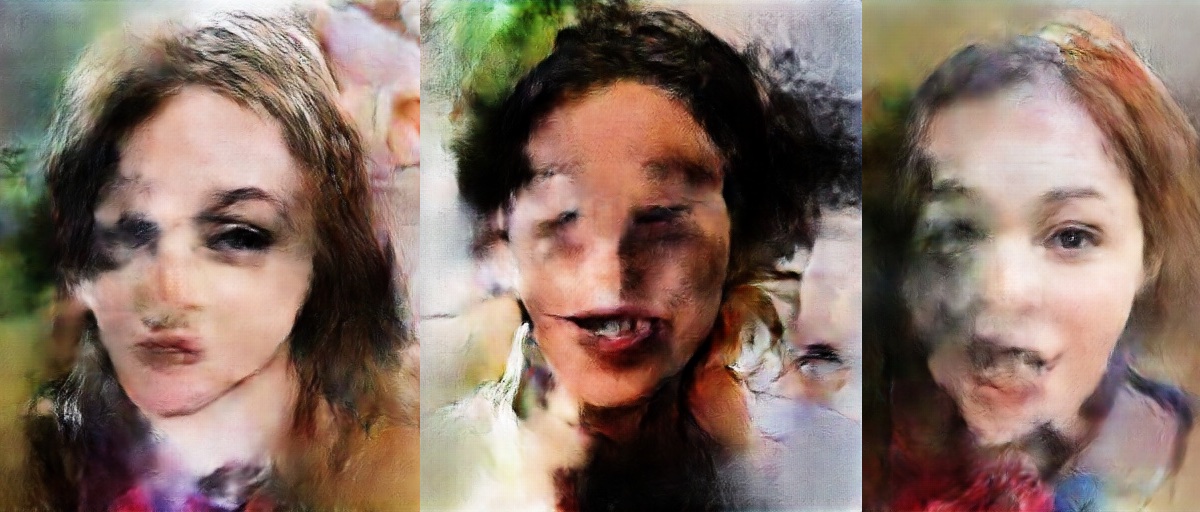
Initially the training will give random noise, as the model is untrained:
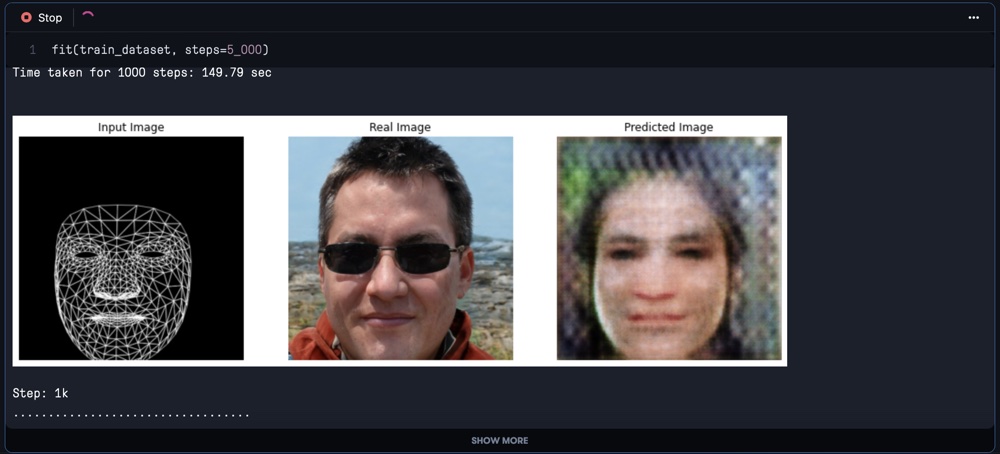
But after a while the results should improve:
Once training is completed, make sure the last cells are ran also.
If training takes too long, you can also stop the cell (press the stop button). You still get a working model; just make sure you execute the last two cells (saving the checkpoint and the generator).
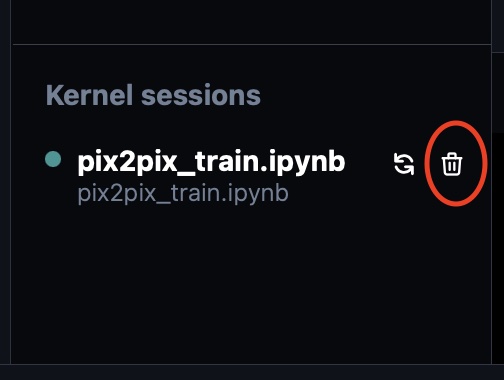
Close and shutdown the script. Make sure in “kernel sessions” you delete the notebook by clicking the thrash icon.
Converting the model
Figment requires the model in Tensorflow.js format (TFJS). We’ve provided a conversion script that you can run once your model is done training.
Open pix2pix_tfjs.ipynb. In this script, make sure the paths are set correctly:
- project_dir should be
_projects/does_not_exist. - The rest of the paths should be correct.

:::info
If you see the output mention something about “out of memory”, it means you’re training script is still running. Make sure to shut it down with the “trash” icon under “Kernel Sessions”.
:::
Downloading the model
Find the tfjs.zip file in the Files sidebar. It should be under does-not-exist>output>v001. Right-click it and choose “Download” (Left-clicking will show an error to the effect of “I can’t show this file”). Once you have the file downloaded, unzip it.
Building the real-time script in Figment
The Figment real-time script is very similar to the generation script. Only you will now use the webcam as the input.
- Create a Webcam Image node.
- Create a Resize node and connect it to the output of the Webcam Image node. Make sure it’s set to 512x512.
- Create a Detect Faces node and connect it to the output of the Resize node. Turn off Draw Contours and turn on Draw Tesselation (as you did in the other example).
- Create a Image to Image model (you might need to scroll down to find it). Connect it to the output of the Detect Faces node. For the model, choose the unzipped tfjs folder.
You should now see your own face being recreated with virtual faces from This Person Does Not Exist.
Here’s an example with a model that’s trained for a number of days: